Don't miss these amazing giveaways and newest tutorials!


7 days of giveaways! 7 amazing prizes equaling more than $130!

Photo book to benefit Zoo Atlanta Giveaway! (ends 3/11) (GIVEAWAY CLOSED)

Cute quick organization jars Tutorial

****Shopping Cart Cover Tutorial!****


Saturday, November 27, 2010

Black friday re-cooperation & Tutorial

Holy Black Friday Hell!

Yesterday I almost got trampled over some zhu zhu pets, a $8 vacumn, and some $2.80 plastic bins! 
That was just our local wal-mart's 12a.m sale. Than I went and shopped for 12 hours straight in the mall and surrounding stores. 
My sister used a wal-mart employees shoulder to climb over things...and my mom got molested by a very touchy man taking advantage of black friday crazyness.

Needless to say I am pooped. But I did come out of wal-mart with a price match on 8 yards of cuddle fleece @$1.99 a yard! So I can't say I am too disappointed.

So today was a day for healing my poor poor feet & spending some much needed time with my family.

Here is one of those promised tutorial links...
(sorry for the shoddy pictures blame it on ...well it's my fault but pretend it's someone else's)


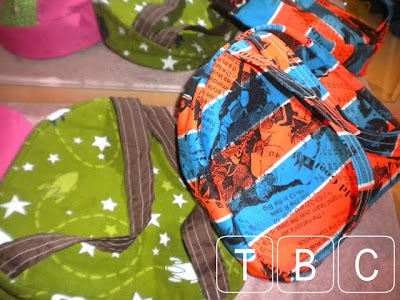
I have had these little back packs on my list to do for a LONG time. I have just now gotten around to them and I have to say they are absolutely adorable!
Great for toddlers because they do not require velcro or zippers (as I know all to well little fingers can get caught in zippers) They can tip it upside down and because of the simple envelope enclosure nothing will pour out! These toddler back packs are so easy to make!


Only thing I did was when I used stiff fabric I did not use interfacing on the band that goes around the pack. I also would make sure to back stitch several times on the straps!

I whipped these up in 30 minutes a bag including cutting time.


So cute and so easy! Now head on over to Indie Tutes, print the pattern out for FREE, and get to making some back packs! Perfect for christmas!
If you don't have time to sit down and sew one you can purchase one in my shop for a limited time by clicking here...(on sale until sunday at 11:59pm.)


Monday, November 22, 2010

The great highschool face splat...

Ah highschool, 2 1/2 years (I graduated early) of ... well it wasn't pretty.


One of my most embarrassing moments would be the day of my great face splat debacle. 

The day started out innocently enough. I was a chubby little sophmore with frizzy hair and a taste for t-shirts from disney... *cringe* I got in the bus in the morning... Slept for the hour it took to get to school, ate breakfast, went to all my classes, etc... Innocent day? Perfect day? I sure thought so..

Picture this... A frizzy haired, chubby, pooh bear wearing, sophmore with an overloaded back pack are crossing the parking lot looking for the bus that is never in the same spot more than once. 

I had one of those moments where you know something has gone horribly wrong the second before it all hits. My only thought was, "oh crap." 

Splat. 

I tripped and because of my overloaded back pack (thank you Flanagan highschool teachers and your lack of usable lockers) I went face first into the concrete not 10 feet from my bus. 

Before I could pick myself up off the ground I hear a spattering of claps and what seems like a whole school laughing at me, but in actuality it was just two buses worth of kids. 

I was mortified and could not even get on the bus. I called my grandmother and told her I missed the bus. 


I waited on the corner with a scratched up nose and a bruised ego for the wind-star van of shame to pick me up.

____________________________

This post is part of
Mama's Losin' It
hosted at http://www.mamakatslosinit.com/

Thankful Not so Wordless Monday...

This coming week is all about being thankful. 

I am so thankful for ... my son. I am also thankful for the lessons (also known to some as mistakes) I made in the past that made me the person I am today. A somewhat wiser, loving mother. 

Here was our week....

{I am thankful we get to see my niece and nephews to play hard outside with S & K)

{I am thankful that he is standing/pulling up on his own}

{I am thankful that we have a good heating system so that he can do this and I don't have to worry he is cold}

{Thankful that my niece lost her tooth FINALLY! but you could not tell cause her other one was already in behind it!}

{Thankful I am healthy enough for Bug to beat up on mommy some and than gave me love}

{Thankful that he is eating solids so well now and that we are slowly over coming the bad gagging reflex that comes with his severe reflex}

{Thankful that he is feeling healthy again so that I can see this gorgeous smile}

{& last but not least (or certainly all) I am thankful that he is finally learning to crawl on hands and knees instead of just his stomach since I was kind of starting to worry}


Thursday, November 18, 2010

37 days and counting


There are only 37 days left until christmas! 

I know what your thinking... Lordie Megan it isn't even thanksgiving yet and your already thinking about christmas?! Well truth me told I have been thinking about christmas for 2 months or more... I already have all of Bug's presents bought (that ones that I am going to buy) & I am wrapping up my sewing for him as well. 

I still have a ton of sewing to do for cousins, siblings, my grandparents, and mom! 

So in celebration I have decided to make 2 gifts a week from either tutorials I have found online or something I made up myself. 

I will post my adventures and links to the tutorial (or my own tutorial) as I go. 

That is 2 tutorials a week! 2 awesome gifts! & Lots to do in the next 5 weeks. 

So check back often for some awesome stuff!

If you are local to the northwest georgia area come and check us out at the North georgia's crafter market! It is this Saturday November 20th from 8am-2pm in Lafayette, GA. That is approximately 35 minutes from Chattanooga, TN.

Tuesday, November 16, 2010

Warm hats with a twist

Have you seen these hats made by Christine over @ From an Igloo?

They are super adorable ! I decided to make one for my son but they came out too big so I am going to remake his in the next few days... However they were great "just because" gifts for my nephews!


This pattern was super easy and very customizable. I am thinking about making it into a teddy bear hat next. You can of course make it without any embellishments & she also shows you how to add the braided tassels if you please. 

Check it out and let me know if you make something out of it. I always like to know that I am inspiring people. 

Friday, November 12, 2010

Neglectful me...

Hello old friends... I am sorry for neglecting you... but my little bug caught a bug ... So the last 15 days have been one throw up session, after a cough session, after a booger sucking session. (TMI , I know) I cannot stress the importance of a good sucker though! lol

Anyway straight to the point our regular stuff will resume come Monday. I am just trying to catch up. He is not completely over this yet unfortunately but he is better to the point where I don't have to hold him almost 24 hours a day. Can't wait to update you on what I have been able to get done around here!

Thanks for remaining loyal!

{this is his yay my nose stopped running face}

Saturday, November 6, 2010

Gouge no more tutorial

Here it is the tutorial I have been promising you!!!

I call these the gouge no more. 


Why? Because they protect your crib that grows with your child into (hopefully) their teen years from being marked with billions of tiny teeth marks! 

My son recently started pulling up on his crib and decided that the railings made good teether's. Unfortunately he was not just making dents he was shaving the wood off! Bad for baby and bad for the crib that will someday become head and foot boards. 

So I remembered seeing cloth biter rail covers (since I didn't like the plastic cause he would probably shave that with his teeth too!) I figured hey cute accessory and productive item as well! So ... Here we go...

First we are going to measure our crib... most standard cribs measure 54x30.

Now here is where we have to do some math on our short sides we are going to do 3 panels so we do 30 divided by 3= 10inches 

Our long side we will do 4 panels so 54 divided by 4 equals= 13.5 inches 

(All panels should be 4-5 inches wide)


Now we need to choose 4 different fabrics. Why 4? 

This is reversible! I like to change things a lot so I made it reversible to support my "habit". 

So cut 8 panels total for your long side (if you have a crib that only has 3 sides they can reach because mine has a high back) and 12 for your short sides! You also need to get some ribbon to match both sides and cut out 26 8 inch pieces of ribbon and heat seal the ends by running a lighter over them for half a millisecond! 

Now we are ready to start sewing! 
I will only explain this once because it is the same for all the sides... 

1} Right sides together we are going to sew our first contrasting panels together with a 1/4 inch seam allowance.


You should have something like this .,..


Repeat for all of them ....


See easy right? 


2} Now turn over all your panels you have just sewn together and press your seams out like this. 


3} Top stitch each seam so that they lay flat and you should have this... Functional and decorative! 


This is what the bottom should look like. 


Repeat on all panels... 

Now we are going to sew our two contrasting sides together! 

4} (sorry no picture but it is self explanatory)  take one rail cover and lay it out take ribbon and place it at ever seam including the end on both sides so that you can tie it on later! Place the contrasting rail cover on top ride sides together and pin the sides together and the ribbon in place as well at the same time! 
(I did one side at a time) 
When doing it one side at a time I had this after one side was sewn. 


Not sew all the way around remembering to back stitch at each ribbon to make it extra secure cause your little ones will be tugging on these! But don't forget to leave approximately 2 inches to turn the cover right side out...

5} Than top stitch all the way around the cover. 


& now you are finished! TA-DA!


Tie them on those rails and admire your work....


You did a good job today! 

Share this with your friends, make some for yourself, or a friends baby!

Have fun! 

(PERSONAL USE ONLY!!! This pattern while not the only one out there is not intended for commercial use. It is of my own making so please respect that!)

Thursday, November 4, 2010

Trick or...stand in line.


My little bug in his halloween outfit... A Modern Day Cowboy!


Ever gone to a halloween walk? 

I did... My first one ever!


It was supposed to be 4 mini cuties, my best friend, and myself.
Well turns out one of our minis had a melt down before we even left and wrote all over the walls of my best friends brand new apartment. So he did not get to do the halloween walk. (harsh? Yes... effective... very!) 

So myself and 3 minis went while best friend and her eldest son sat in the car. 
Now... just in case you have never done a halloween walk before let me explain what it is... Local businesses come and set up with candy and cards. Can you guess who gets what? Yep the parents get jipped! Not to mention there were 215 people... count them 215 people in front of us. No joke. We waited in line for an hour for a 10 minute walk. But... I love those kids. 

So it was fun! 

{best friend and her mini cuties}

{Mommy and bug}


We than went to town for a trick or treat neighborhood walk that the police were helping with by blocking off streets. This was so much fun! (melt down child did get to trick or treat here) To see the joy on my little boys face every time someone fawned over him and to watch him look inside the trick or treat bag at every stop was so funny!


I could just see him licking his lips every time a peanut butter cup went in because he knows that momma let's him have that kind of candy. (he is limited because of the lack of teeth and good chewing abilities at 9 months old)


& he fell asleep the last half a block.

So all in all halloween went great! I even dressed up in my black "budget ninja costume" shirt. 

What did you do for halloween? Lots of candy goodies? Are you sneaking some of them? I know I am! 


Related Posts with Thumbnails